Note: This guide is based on verified repair protocols. As an Amazon Associate, I earn from qualifying purchases.
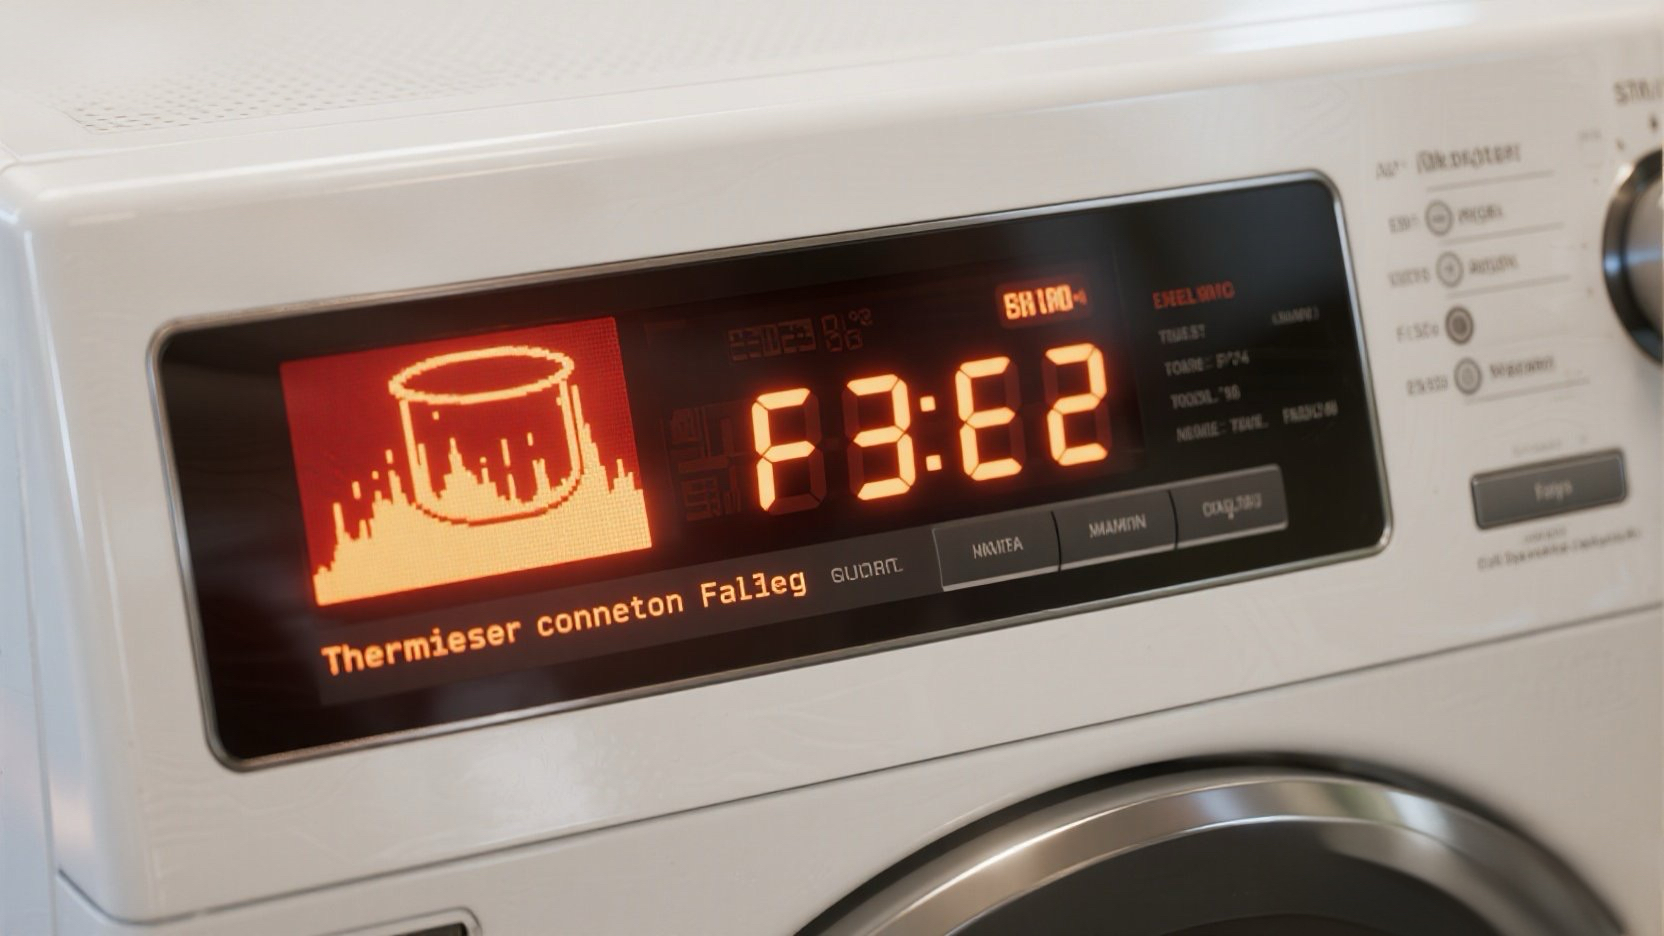
You hit start, the washer runs for a bit, and then boom: F3 E2 flashes on the display. This error code specifically means “Inlet Water Temperature Sensor Fault”. The computer (CCU) thinks the water is either freezing cold or boiling hot because the sensor (Thermistor) is giving a bad reading.
The Good News: This is rarely a computer failure. It is almost always a bad sensor ($20 part) or a simple broken wire in the back.
🎥 The Repair Video
This 4-minute guide covers the complete replacement process. Watch it first to understand the location of the sensor, then follow our detailed notes below for the specific resistance values you need to test.
🛒 Parts & Tools Checklist
Don’t start unscrewing things until you have these. The sensor is model-specific, so check the link to ensure fit.
-
The Replacement Part (Thermistor):
👉 Check Price for OEM Whirlpool Temperature Sensor -
Essential Tool (T-20 Torx):
Torx Screwdriver Set (Required for back panel) -
Multimeter (Don’t Guess, Test):
Digital Multimeter
🔧 Step 1: Access the Sensor (Back Panel)
Safety First: Unplug the washer.
On most Whirlpool Front Loaders (Duet models), the sensor is located at the bottom rear of the wash tub. You do NOT need to take the machine apart completely.
- Pull the washer away from the wall.
- Use a 1/4″ Nut Driver or T-20 Torx to remove the screws around the perimeter of the large rear metal panel.
- Remove the panel and set it aside.
⚡ Step 2: The “Real World” Fix (Check the Black Wires!)
Stop! Before you replace the sensor, look at the wires.
There is a known issue on these machines where the vibration of the drum causes the wires to rub against the zip ties holding them to the tub.
- Locate the temperature sensor (it is inserted into the heating element housing at the bottom).
- Follow the two black wires coming from it.
- Look closely at the first zip tie. Tug gently on the wires.
Steve’s Field Note: In about 50% of cases I see, the sensor is fine, but one of the wires has snapped inside the insulation right at the zip tie. If you find a broken wire, simply splice it back together, and you just saved $30!
Ω Step 3: Testing the Sensor (The Multimeter Test)
If the wires look good, you must test the sensor itself to confirm it’s dead.
- Disconnect the wire harness from the sensor (press the small tab and pull).
- Set your multimeter to 20k Ohms ($\Omega$).
- Touch the probes to the two metal terminals on the sensor.
What is a Good Reading?
- Good Sensor: You should see a reading between 10,000 to 14,000 Ohms (10k-14k Ω) at room temperature (around 70°F).
- Bad Sensor (F3 E2): If your meter reads OL (Infinity) or 0 (Short), the sensor is toast. Replace it.
🛠️ Step 4: Replacing the Sensor
If you confirmed the sensor is bad, swapping it is easy.
- Locate the 10mm nut in the center of the heating element bracket (between the heater terminals).
- Loosen this nut significantly (but don’t take it all the way off). This relaxes the rubber compression seal holding the sensor.
- Grasp the old sensor and wiggle it out. It might be tight due to scale buildup.
- Install the New Sensor: Slide the new one in. Make sure it seats flush.
- Tighten the 10mm Nut: This expands the seal. Tighten it until snug—do not overtighten or you might crack the housing.
- Reconnect the wire harness.
🔄 Step 5: Clearing the Code
The F3 E2 code might stay in memory even after the fix. To clear it:
- Plug the washer back in.
- Select any one button (except Power/Start).
- Press and hold it for 3 seconds, release for 3 seconds, repeat 3 times.
- Or, simply run a “Drain & Spin” cycle to verify the error is gone.
Did the test fail? Grab the official sensor below:
🚀 Recommended Replacement Part
Genuine Whirlpool Water Temperature Sensor (Thermistor)